

How to prepare truck rims for painting?
Aug 06, 2025
Leave a message
Hey there! I'm a supplier of truck rims, and I know that painting truck rims can really transform the look of a truck. It's not just about aesthetics; a well - painted rim can also protect the metal from corrosion and wear. In this blog, I'll walk you through the steps on how to prepare truck rims for painting.
Step 1: Gather Your Tools and Materials
First things first, you need to get all the stuff you'll need. Here's a list:
- Safety gear: Gloves, safety glasses, and a respirator. You don't want any chemicals or dust getting into your eyes, lungs, or on your skin.
- Cleaning supplies: Degreaser, soap, and water. You'll use these to get rid of all the grime and dirt on the rims.
- Sandpaper: Different grits, starting from coarse (around 80 - 100 grit) to fine (220 - 400 grit). The coarse sandpaper is for rough sanding, and the fine one is for a smoother finish.
- Masking tape and plastic sheeting: To protect the parts of the truck and the tire that you don't want to get paint on.
- Primer: A good quality primer that's suitable for metal surfaces.
- Paint: Choose a paint that's designed for automotive use and can withstand the elements.
Step 2: Remove the Rims from the Truck
This might seem obvious, but it's an important step. You need to have easy access to the entire rim. Use a jack to lift the truck and then remove the lug nuts to take off the wheel. Make sure to place the wheel on a flat and stable surface.
Step 3: Clean the Rims
Once the rims are off, it's time to clean them up. Start by using a degreaser to remove any oil, grease, or brake dust. Spray the degreaser on the rim and let it sit for a few minutes. Then, use a brush to scrub the surface thoroughly. Rinse the rim with water and dry it completely. You can also use soap and water for a more thorough clean. This step is crucial because any dirt or grease left on the rim will prevent the paint from adhering properly.
Step 4: Inspect the Rims
Take a close look at the rims for any signs of damage, such as cracks, dents, or rust. If you find any cracks, it's best to replace the rim as painting won't fix a structural issue. For dents, you can try to hammer them out gently if they're not too severe. Rust needs to be removed completely. You can use a wire brush or sandpaper to get rid of the rust.
Step 5: Sand the Rims
Sanding is one of the most important steps in preparing the rims for painting. Start with the coarse sandpaper to rough up the surface. This helps the primer and paint adhere better. Sand the entire rim, including the edges and the inside. After using the coarse sandpaper, switch to a finer grit to smooth out the surface. Make sure to sand in a consistent direction to avoid creating uneven patches.
Step 6: Mask the Rims
Use masking tape and plastic sheeting to cover the parts of the rim that you don't want to paint, like the valve stem and the areas that will be in contact with the tire. You can also cover the tire itself to prevent any overspray. Take your time with this step to ensure a clean and professional - looking paint job.
Step 7: Apply the Primer
Before you start applying the primer, make sure the rim is clean and dry. Shake the primer can well according to the manufacturer's instructions. Hold the can about 8 - 10 inches away from the rim and apply a thin, even coat of primer. Let the primer dry for the recommended time, usually a few hours. You may need to apply a second coat of primer for better coverage.
Step 8: Sand the Primer
Once the primer is dry, use a fine - grit sandpaper (around 400 grit) to lightly sand the primed surface. This will smooth out any bumps or imperfections and help the paint adhere better. After sanding, wipe the rim with a clean, dry cloth to remove any dust.
Step 9: Choose the Right Paint
When it comes to choosing paint for your truck rims, there are a few things to consider. You want a paint that's durable, resistant to chipping, and can handle the heat and friction from the road. There are different types of paints available, such as enamel, acrylic, and powder - coat. Enamel paints are known for their durability and high - gloss finish. Acrylic paints are more affordable and easier to apply. Powder - coat is a very durable option, but it usually requires special equipment to apply.
Step 10: Apply the Paint
Just like with the primer, shake the paint can well. Hold the can about 8 - 10 inches away from the rim and apply thin, even coats of paint. Start from the center of the rim and work your way out. Let each coat dry for the recommended time before applying the next one. Usually, you'll need 2 - 3 coats of paint for a good finish.
Step 11: Let the Paint Cure
After applying the final coat of paint, let the rim cure for the recommended time. This can take anywhere from a few days to a week, depending on the type of paint you used. During the curing process, avoid touching the painted surface or mounting the rim back on the truck.
Step 12: Reinstall the Rims
Once the paint is fully cured, remove the masking tape and plastic sheeting. Carefully mount the rim back on the truck and tighten the lug nuts to the proper torque specification.
Now, I know you might be thinking about which rims to paint. We offer a wide range of truck rims, including the 16.0X6.0 Steel Tubeless Wheel, the Steel Without Inner Tube 17.5*6.75, and the Truck Wheel 19.5x7.50. These rims are made of high - quality materials and are perfect for a fresh paint job.
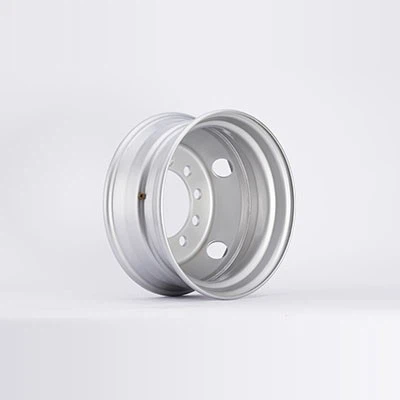
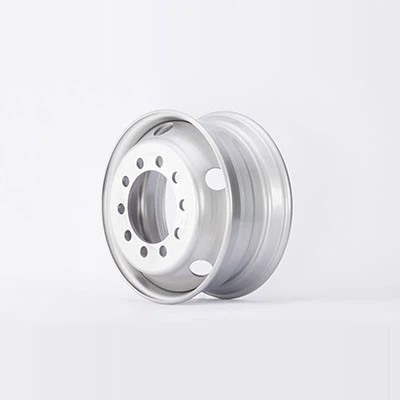
If you're interested in purchasing our truck rims or have any questions about the painting process, feel free to reach out to us. We're always here to help you with your truck rim needs. Whether you're a professional mechanic or a DIY enthusiast, we've got the rims and the knowledge to make your truck look its best.
References
- Automotive Painting Basics: A Guide for Beginners. Available in local automotive libraries.
- Truck Rim Maintenance and Painting Manuals from major automotive manufacturers.
Send Inquiry